KM6USO.net Online

Logo for United Service Organizations

Following the rapid learning cycle of the past few weeks, it seemed like the right time to finally document and share some great knowledge related to Amateur Radio. Given the narrow audience that might find this interesting, I decided to create a new site to house the growing collection.

If you are a licensed amateur radio operator or want to learn more, please visit and let me know what you think. I look forward to bumping in to out there on the air one of these days!

Note Regarding the USO Image

I feel fortunate to have been sequentially assigned this callsign from the FCC in 2018 as it is both memorable and has a unique historical reference (the United Service Organizations).

Need: Stealth Serial Port for Power Macintosh G4

This is the first in a series of posts highlighting obscure or discontinued technology products I would like to acquire for the vintage Mac lab.

As the years go by, I realize that after I’ve exhausted Google and eBay trying to acquire an obscure item I need, if nothing turns up available it’s easy to forget all the details when I want to try again later. That’s where these notes come in.

Furthermore, in the off chance you the reader should stumble across this post and have one to offer, well all the better for using the blog. Please contact me if you have one of these you’d like to sell!

Product: Stealth Serial Port for Power Macintosh G4 – Universal Model
Company: GeeThree Software, LLC
Status: Discontinued/Sold Out
URL: http://geethree.com/stealth/index.html

Here is a screenshot with the product details just in case the site or company vanishes in the coming years:

From: http://geethree.com/stealth/index.html

Use Case: I’m trying to see if I can move the LocalTalk Bridge and IPNetRouter system from a Quadra 700 over to a PowerMac G4. The G4’s have built-in Ethernet but do not have a serial port for LocalTalk.

There would be several advantages to the G4 over the Quadra, chief among them is just the elimination of an additional server since I already have to run a G4 for the AppleShare file sharing chain from System 6 and 7 machines; to the G4 with OS9; to another G4 with OS X 10.5 Leopard; to the modern network (the subject of a future post).

More Raspberry Pi Setup Notes for VNC and BOINC

Yes, I realize these posts aren’t exactly riveting, but alas I’m essentially sharing my lab notebook here.

Setting up X11VNC:

sudo apt-get install x11vnc

Then configuring to run on startup:

cd .config
mkdir autostart
cd autostart
nano x11vnc.desktop

[Desktop Entry]
Encoding=UTF-8
Type=Application
Name=X11VNC
Comment=
Exec=x11vnc -forever -display :0 -ultrafilexfer
StartupNotify=false
Terminal=false
Hidden=false

Lastly, installing BOINC:

sudo apt-get install boinc-manager boinc-client


Updated: Telex-like Retro Twitter Newswire

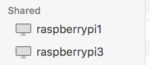
Having recently moved a few services over to a Raspberry Pi, I’m now using Rainbowstream as the command line Twitter client. The install commands to remember were:

sudo apt-get install python-pip -y
sudo pip install rainbowstream

After tweaking my terminal settings as described in my original post below, I now have a nice low bandwidth Twitter client… retro style:

retrotwitter

My original post from August 7, 2010:

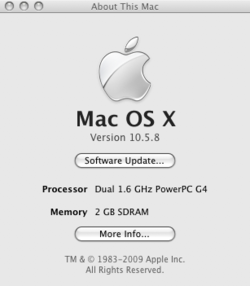
Wondering what Twitter might have looked like a few decades ago? Maybe seeking a nostalgic way to get your news headlines? It’s easy to go retro with today’s tools–in this case the Terminal app in Mac OS X and TTYtter, a command line Twitter client written in Perl.

First install and authorize TTYtter as per the instructions on the website (it’s really much simpler than it appears when reading the directions, took maybe 5 minutes including authorization with the Twitter mothership). If you are looking for just news headlines, you might want to setup another Twitter profile to follow just breaking news sources, as TTYtter doesn’t yet support lists.

Then find and install a nice retro font, like the free Teletype 1945-1985 by E.V. Norat II. Next, In Mac OS Terminal, go to Preferences to create a new skin, specifying the new font and a pleasant vintage paper-like color for the background. Play with these settings until you get it to look just how you like.

Finally, open a new shell using the skin you created and run TTYtter for a retro Twitter newswire! Let me know if you can figure out how to add authentic sound effects. Enjoy!

Blog Migration Complete

Road to the Gorge
Road to the Gorge, 2011

Well, it has been just over 3 years since I began the process of migrating out of Tumblr—let’s just say life has been a little busy during that time. Anyhow, the bulk import is finally complete and I can now start grooming the content and, most importantly, begin adding fresh posts.

I must say the tipping point was finally moving to WordPress and leveraging the automated import tools. I’ve enjoyed RapidWeaver and will continue to use it for some specific projects, but settling on an industry standard platform has some advantages.

Anyhow, things might be a little messy for a while. Please excuse the dust.

Windows 8 Installed in Lab

I’ve been curious about getting to experience the “metro” UI in Windows 8, so with the consumer preview now available for download, I didn’t waste any time getting it running in the lab. Now granted it will be the desktop experience through a VM with no touch experience, but alas, isn’t that the point of a unified interface?

Installation from the 64-bit ISO image into VMware Fusion 4.1.1 on MacOS 10.6 was uneventful. After the obligatory interrogation for personal information (including birthdate) and registration with Microsoft (no doubt to primarily power the Store), things went as expected until I arrived at the tiles. After dropping into a full screen experience of Internet Explorer, it took me a second to figure out how to get back (Control-Escape). That and the horizontal scroll were a little disorienting.

I’ll need some more time to write a review of any length, but for now a couple screen shots of note including the home screen (at top), full screen Internet Explorer and the Store <images missing>.

Setting Sparkline Axes in Excel 2011

In the course of doing some data modeling this morning, I found myself confused by the default behavior of sparklines in Excel 2011.

As these small charts are useful in making comparisons, it didn’t makes sense that the axes were different for each sparkline summarizing individual rows in a range.

In the above example, the first data point is the same in both rows and should be scale (note is is larger in the second row). Using the “Automatic” setting in Excel (the default mind you), the vertical axis is set independently for each sparkling.

After fixing the problem using the steps below, you can see the difference in the “Same” column. The first data point is now scale and the graphics are useful for comparison.

On the ribbon (in Excel 2011 for Mac at least), click Charts > Sparklines and click Axes to bring up the the settings below:

On the Vertical tab, select “Same for all sparklines” for both Minimum and Maximum values. Clearly this might be different for different uses and formats of sparklines, but for simple comparisons, it would seem that “Same” should be the default.